

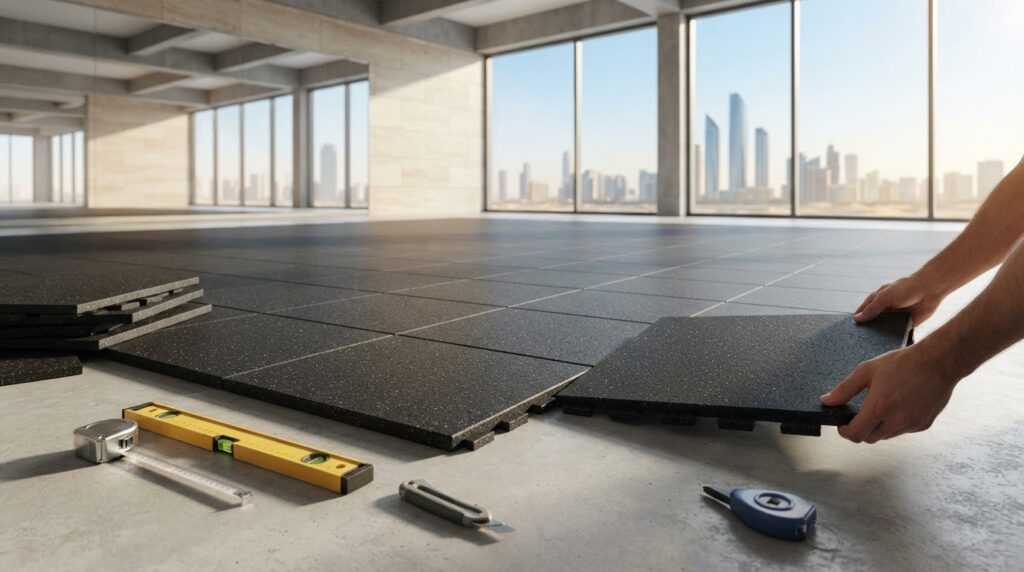
Fast assembly won’t make up for tiles laid over an unsuitable floor. People searching for interlocking gym tiles UAE often start by comparing products, but a stable installation starts with the surface beneath them. Before opening the packs, check that the existing floor is clean, level, dry, and suitable for the selected tile. Small problems underneath can lead to shifting tiles, open seams, or uneven edges.
A neat finish depends on assessing the space and planning the layout before fitting the first tile. This guide explains how to inspect and prepare the floor, measure the area, plan cuts, and work around walls and obstacles. It also covers what to check after installation and how to maintain the finished surface.
Use the tile manufacturer’s instructions for installation details, because requirements vary by product. If the floor has persistent uneven areas or you’re unsure whether it is suitable, get flooring advice before beginning. Preparation can help avoid adjustments after installation.
Key Takeaways
- Assess the base before fitting interlocking gym tiles UAE. Tiles won’t correct a damp, dirty, or unsuitable floor.
- Measure and sketch the room before opening packs, including walls, columns, equipment, and door swings.
- Dry-lay tiles to check the reference edge and identify where cuts may be needed.
- Follow the selected product’s installation instructions, then inspect seams, edges, and alignment across the finished floor.
- Check high-use areas regularly for movement or damage, and seek flooring support if the surface needs professional input.
Interlocking Gym Tiles UAE: Check the Space Before You Start
Interlocking tiles won’t fix a damp, dirty, or unsuitable base. If the floor underneath is unstable or uneven, those problems can affect the finished surface, no matter how neatly the tiles connect. Before planning coverage, inspect the room and confirm that the selected tile suits both the floor and the intended use.
Interlocking tiles are modular pieces that connect along their edges. This format may suit a home gym or a defined training zone, but the connection method alone doesn’t show how a particular tile will perform. Check the manufacturer’s guidance for intended use, installation limits, and base requirements. A broad overview of interlocking floor tiles includes examples of gym use, but the selected product’s instructions should guide your installation.
Is the existing floor ready for interlocking tiles?
Inspect the room before moving equipment into place. Note visible cracks, loose finishes, debris, and transitions where the floor changes height. Look for signs of moisture, then use the flooring supplier’s recommended assessment method instead of guessing. If you can’t confirm that the base is suitable, pause and get flooring advice before buying or fitting tiles.
Record the details that will affect coverage: fixed obstacles, door swings, drains, and the footprints of equipment that won’t move. These can influence where the layout begins and whether a continuous tiled area makes sense. For example, don’t plan to cover a drain without first checking the product and site requirements.
Match the tile format to the training area
Start with the planned activities and equipment, not the tile. List what the space needs to accommodate, then distinguish general exercise areas from places where heavy or concentrated equipment loads will sit. Don’t assume one tile format suits every zone. Confirm load suitability and other limits with the manufacturer.
This check can reveal a useful trade-off: a small, defined area may suit modular coverage, while a larger or more complex space may need a different flooring approach. For broader selection context, see Fitness Flooring UAE: The Technical Guide to Gym Facility Surfaces in 2026. Nutrihub Store offers fitness and sports flooring and gym setup services, which can help if your project needs professional flooring input.
Once you’ve assessed the space, plan around its actual constraints instead of discovering them during installation. Keep your notes and product instructions nearby as you measure and prepare to dry-lay the first row.
Plan Interlocking Gym Tile Layout Before Fitting the First Row
A rushed starting line can leave awkward slivers at a doorway or cuts crowded against a visible edge. Before connecting tiles, map the room and test the layout. For interlocking gym tiles UAE projects, a simple sketch can show where full tiles will fit and where trimming may be necessary.
Follow this order: measure, sketch, set a reference edge, dry-lay, then mark cuts. Check the selected tile’s orientation and edge profiles first. Some systems have directional patterns or different edges for perimeter pieces, so confirm the product instructions before joining rows.
Measure the room and establish a starting line
Measure the usable floor area in more than one place, especially if the walls may not be square. Record the dimensions and mark columns, doorways, fixed equipment, and the direction each door swings. A scaled sketch doesn’t need to be elaborate. It should show enough detail to reveal layout conflicts before installation.
Use the sketch to choose a straight reference line and decide where the first row will sit. Consider visible edges and transitions as well as walls. If starting from one side would leave a very narrow strip at the opposite edge, adjust the layout before fitting tiles so that cut pieces don’t dominate the finish.
Dry-lay tiles around equipment and obstacles
Place sample tiles without locking the whole floor together. Check how the rows meet the reference line and how the layout falls around columns, doorways, and fixed equipment bases. Adjust the proposed starting point if a joint would land awkwardly or a narrow cut would be difficult to fit neatly.
Dry-laying also lets you check tile orientation and how adjoining edges fit before committing. Mark cuts only after comparing the layout with the room. Use the tools and cutting method permitted by the tile maker. A method suitable for one tile may not work for another.
Don’t guess how many spare tiles or cut pieces to allow for. Ask the supplier about the project allowance, then compare that advice with the product instructions and your measured plan. If you’re comparing flooring options for the setup, review fitness and sports flooring before choosing a product.
Keep the sketch and measurements nearby during installation. They’ll help you check each row against the plan before fitting and trimming the tiles.
Prepare the Subfloor and Fit Interlocking Gym Tiles Step by Step
A clean-looking floor can still cause installation problems if it’s damp or damaged. Before fitting interlocking gym tiles UAE, use the selected product’s instructions as your guide. General advice can’t confirm whether a particular tile needs a specific joint method, cutting tool, or preparation step.
Work through the stages in order: clear, clean, dry, inspect, align, connect, and trim. Don’t add adhesive, underlay, acclimation time, or spacing unless the manufacturer’s instructions call for it. Tile systems differ, and an unverified extra step can interfere with the fit.
Clean and prepare the floor safely
Remove loose items, then clear dirt and debris that could sit between the floor and tiles or obstruct their contact. Follow the flooring supplier’s directions for cleaning and drying. Don’t start laying tiles until the surface meets those instructions. Avoid improvising with cleaning products or preparation methods the supplier hasn’t approved.
Once the surface is dry, inspect it again. If you find unresolved moisture, loose finishes, or damage, pause rather than covering the problem. Ask the flooring supplier or a flooring professional how to assess it. Tiles can conceal a defect without fixing it, leaving an issue beneath the finished surface.
Connect rows and finish the edges
Begin at the reference edge you chose during layout planning. Use the joint method specified by the tile maker, and connect tiles gradually rather than forcing a full row together at once. After each short run, check that the edges meet as intended and the row still follows your reference line. Correct any drift early, before it becomes harder to resolve as more tiles go down.
Keep checking across the floor. Look for joints that don’t sit together properly or rows that angle away from the planned layout. If a tile resists connection, stop and check its orientation and edge profile against the instructions instead of forcing it into place.
Fit perimeter pieces and transitions only after confirming the required cut and edge-finishing method. Use the manufacturer-approved tools and technique, especially around corners or fixed obstacles. A cut that fits one edge may not finish neatly at a doorway, so check each piece in position before trimming.
Compare the completed area with the product guidance. If an installation step is unclear, ask the supplier before proceeding. Flooring support can help resolve questions that the instructions don’t answer.
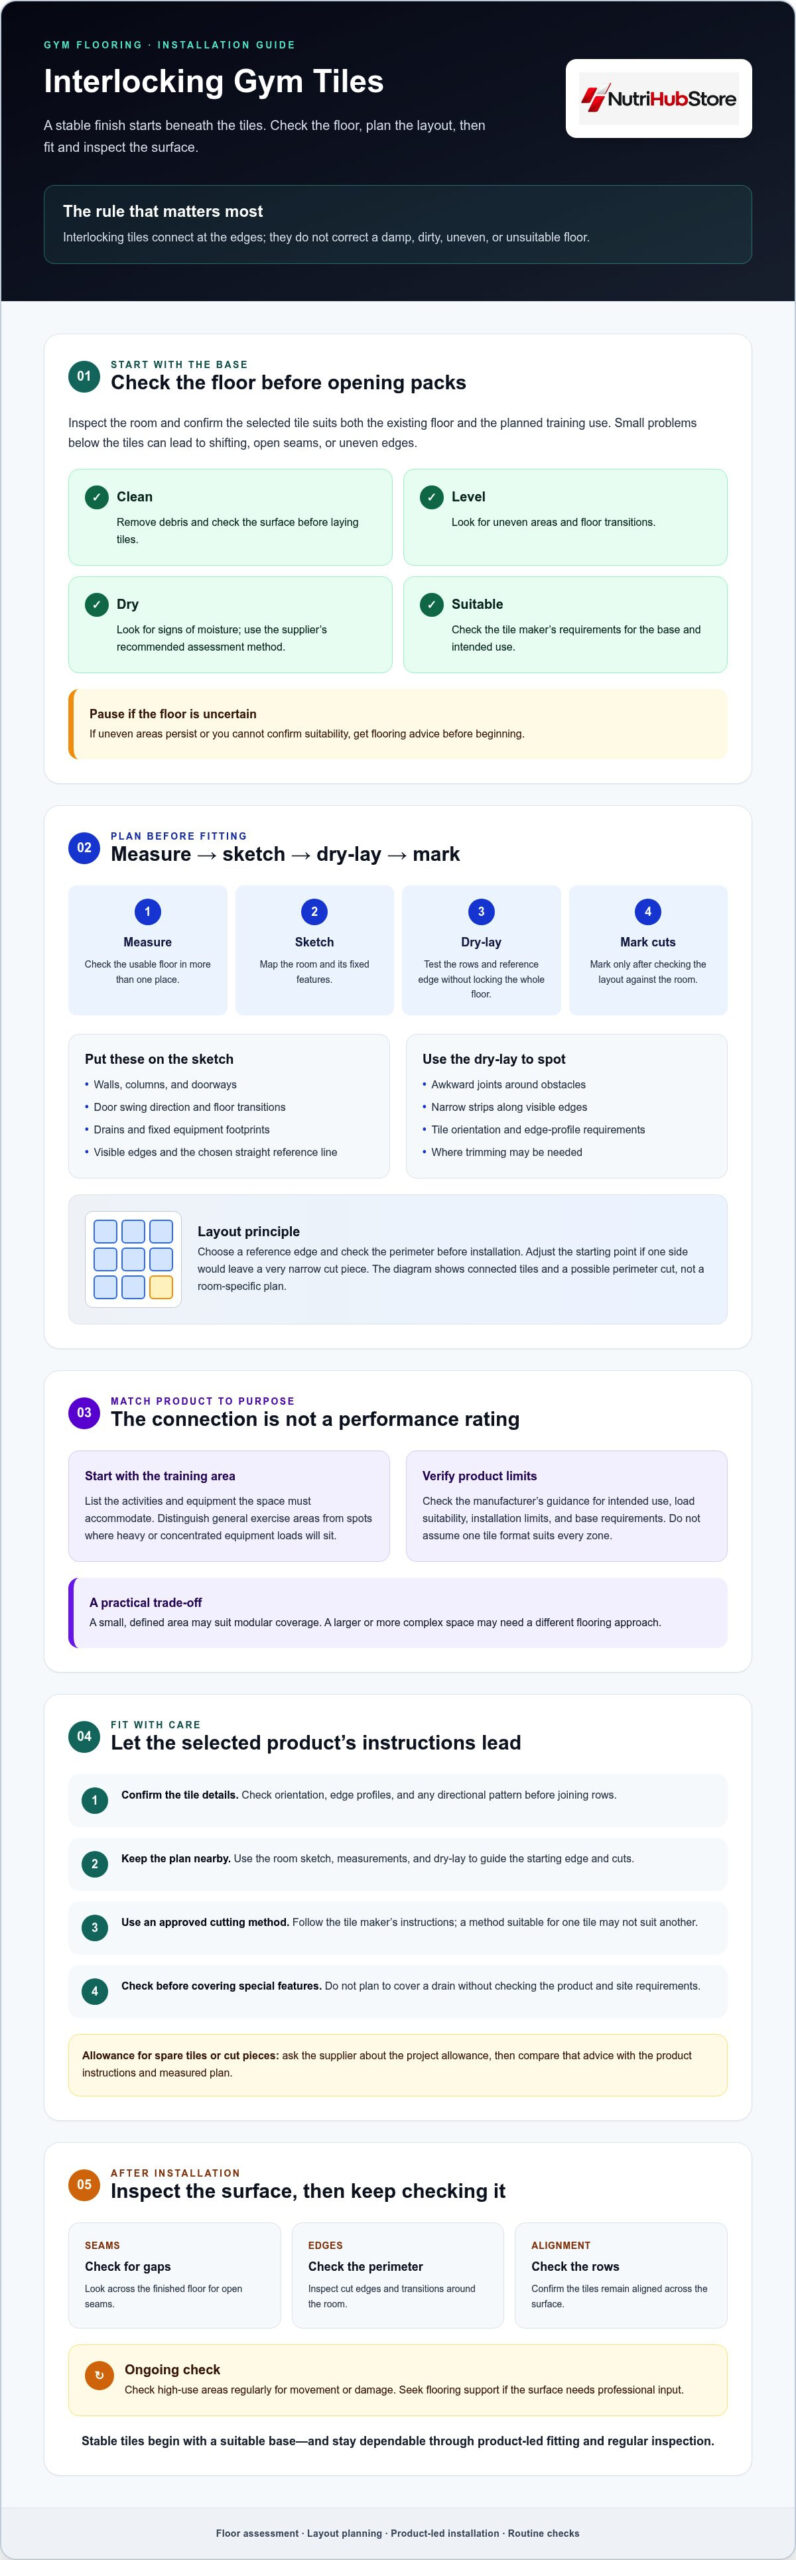
Check Tile Stability, Seams, and Suitability for Gym Use
A floor can look complete while a loose edge or open joint is easy to miss. Before placing equipment or using the area, inspect the installation and check that the tiles behave as the manufacturer describes. Interlocking gym tiles UAE projects may use different systems, so don’t expect every surface to feel or respond in the same way.
What to inspect immediately after installation
Walk the full area carefully and look along each row, including the perimeter and transitions. Check for open joints, lifted edges, visible gaps, and rows that drift out of alignment. Pay particular attention to cut pieces, doorways, columns, and equipment bases, where a poor fit may be less obvious from the centre of the floor.
Confirm that cuts sit neatly without pushing connected tiles out of shape. Then check for movement as you walk, following the product guidance rather than assuming every tile system should feel identical. Before using the space, note any loose connection, damaged surface, or unclear transition so it can be checked and resolved.
When should you stop and ask for flooring advice?
Don’t load the floor with equipment until you’ve checked the tile maker’s guidance for the intended use and equipment placement. Weight concentrated in a small area may raise different suitability questions from general exercise use. Review the tile’s technical information and ask the supplier about your planned equipment and its placement. If tiles separate, lift, or fail to sit as instructed, stop and ask the supplier or installer how to address the issue.
Seek advice if moisture, unevenness, or damage in the base remains unresolved. Covering it with tiles doesn’t establish that the floor is suitable. For material-selection context, consult Rubber Flooring for Gym UAE: How to Choose the Right Surface, then confirm the chosen product’s limits and care guidance.
Installation check:
- Inspect seams and perimeter edges across the entire area.
- Check cuts around obstacles and transitions for a clean fit.
- Walk the floor and note any movement, lifted edges, or visible damage.
- Confirm equipment placement against the tile maker’s guidance.
- Record unresolved concerns and ask the supplier or installer before use.
Keep this punch-list with your installation notes. It gives the installer or facility manager a clear record of what needs attention, instead of relying on memory after equipment is in place.
To compare flooring options for your project, visit Nutrihub Store’s fitness and sports flooring range.
Maintain Interlocking Gym Tiles and Plan Your Next Step
Repeatedly pushing a shifting tile back into place can hide the cause without fixing it. Keep the surface clean and check high-use areas regularly, but investigate recurring movement or damaged edges rather than treating them as routine maintenance.
Build a simple inspection and cleaning routine
Follow the care instructions for the specific flooring material. Remove loose debris promptly using an approved method, and check which cleaning products the manufacturer permits before applying them. Generic cleaners or tools may not suit every tile surface, so don’t assume a familiar product is safe for your floor.
Include a quick surface check in routine facility reviews. Focus on seams, perimeter edges, transitions, and points where equipment contacts the floor. Look for shifting, damaged edges, open joints, or changes since the previous inspection. Record recurring issues, including where they appear, and contact the supplier before attempting repairs or repeatedly reconnecting tiles.
A written record can help distinguish an isolated issue from a pattern. If movement keeps returning in the same area, note the nearby equipment and whether the problem follows a particular edge or joint. These details can help the supplier assess what needs attention.
When professional gym flooring support can help
DIY upkeep may not be the right approach for a large floor, an irregular room, several equipment zones, or a substrate issue that remains unresolved. Reconfiguration or professional input may be more appropriate than repeated adjustments, especially if tiles won’t stay connected as instructed.
Before work begins, ask the provider to confirm the product’s suitability for the planned use, the manufacturer’s installation requirements, and what the proposed work includes. For broader facility planning, Comprehensive Gym Setup Services in the UAE: Building Performance Facilities offers a relevant next area to consider. Nutrihub Store provides gym setup services and fitness and sports flooring. Confirm the specific options and project scope before proceeding.
Keep the tile’s care and installation instructions available for anyone responsible for cleaning or checking the floor. This helps ensure routine upkeep follows product guidance rather than guesswork, and gives you useful details to share if problems recur.
For project planning, you can also review Nutrihub Store’s fitness and sports flooring options.
Set Up Your Gym Floor with Confidence
A dependable installation starts before the first tile goes down. Check that the existing floor is suitable, map the room around walls and equipment, and follow the selected product’s instructions instead of relying on assumptions. For interlocking gym tiles UAE, careful planning can help you avoid awkward cuts and spot fit issues before the area is in use.
Once installed, inspect seams, edges, and transitions across the full surface. Check high-use areas regularly, and ask the supplier or a flooring professional about recurring movement, damage, or unresolved concerns rather than repeatedly making DIY adjustments.
Nutrihub Store offers fitness and sports flooring, gym setup services, and equipment servicing. If you’re comparing options for your project, review the available flooring choices and confirm product suitability and scope before proceeding.
With a measured plan and product-specific guidance, you can move ahead with greater confidence and a floor prepared for its intended use.
Frequently Asked Questions
Can I install interlocking gym tiles over an existing floor?
Sometimes, but the existing surface must meet the tile manufacturer’s requirements. For interlocking gym tiles UAE, check that the base is clean, dry, stable, and suitable before laying anything over it. Loose finishes, visible damage, moisture, or pronounced unevenness can undermine the fit. If you can’t confirm the floor’s condition, ask the tile supplier or a flooring professional to assess it before installation.
Do interlocking gym tiles need adhesive?
Not every interlocking tile system uses adhesive. The correct method depends on the product and installation setting, so check the product guide and confirm any requirements with the supplier. Don’t assume adhesive will improve stability. It may conflict with the manufacturer’s instructions or make future removal difficult. Use adhesive only if the selected product’s guidance permits it for your application.
How do I cut interlocking gym tiles around walls and columns?
Dry-lay the tiles first, then mark each cut against the wall or obstacle, following the product’s edge and movement requirements. Use only a cutting tool and method approved by the manufacturer, and protect yourself and the surrounding surface while working. If you have a spare tile, test the method on it first. Check that the finished edge sits neatly without pulling connected tiles out of shape.
Can interlocking gym tiles support heavy gym equipment?
Suitability depends on the tile’s construction, the equipment’s weight and contact points, and the condition of the subfloor. Don’t infer load capacity from appearance or a general product description. Review the tile’s technical information and ask the supplier about your planned equipment and its placement. Confirming this before installation can help prevent a mismatch between the flooring and how the training area will be used.
How do I stop interlocking gym tiles from separating?
First check that the base is suitable and the tiles follow the correct orientation and joining method. Look for uneven areas, tight cuts, nearby obstacles, or equipment placement that may affect the joints. Don’t force tiles together or add adhesive unless the product instructions allow it. If joints keep opening, pause use of the affected area and ask the supplier or installer to investigate instead of repeating a temporary fix.
How should I clean interlocking gym tiles?
Follow the care instructions for the exact flooring material, since approved cleaning products and methods can vary. Remove loose debris and handle spills as the manufacturer recommends. Avoid solvents, harsh chemicals, excess water, or abrasive tools unless the product guide allows them. Check edges and joints during routine cleaning, too. This makes it easier to spot damaged sections or openings before they become harder to address.